Steel Bridge
Mechanical Machine Shop Lead
Positions

Machine Shop
During my junior year, I took on the role of Machine Shop Lead. This position required me to schedule shop hours during my free time to help train new members on how to create the high precision connections needed to hold the bridge members together. Etcheverry Student Machine Shop is filled with lathes, mills, a water jet, drill presses, and much more. For the Steel Bridge Team, we primarily used the lathes and mills for all our connection needs.
Connections
Hours
I held shop hours every week on Thursdays from 2pm – 5pm. For the first six or so weeks, my shop hours were for teaching the new members how to machine a different connection (either the male or female side). I would pull out the Solidworks drawing, verbally explain how each cut is made and in what order, and then check out the correct machine to make the part. I would demonstrate how to cut the part, and reiterate my explanation for each step’s purpose. This explaining and answering questions would typically take the first hour, and then I would have each member practice on their own machine. As they spent the next hour doing it themselves, I would walk around and further explain and help those who needed it. I would use the last hour to try and pump out as many parts as I could to make sure production did not fall behind. Once all the types of connections were taught, I would spend the second half of the semester delegating parts and quantity to each member to ensure we had enough connections to assemble the bridge. I would assign parts based on the team members strengths and weaknesses. I did my best to ensure each member felt comfortable making all the types of connections without letting our deliverable quantities fall behind.
Expanding Capabilities
As a Machine Lead, I still had plenty of material and machining practices to learn from the older members and shop staff. I would meet older members outside of my shop hours to learn about more advanced machining practices; the main type being CNC milling. Some of our connections (male shield pictured above) would have radii too precise to machine manually. Learning CNC milling allows the Steel Bridge team to design more complex geometries that can still be machined by students.
Continuing to improve and learn new techniques allows the team to further expand our engineering capabilities while improving the bridge’s performance.
Deliverables
After a semester of learning and machining, the mechanical machine shop team produced around 240 connections. Approximately a third were CNC milled, the remaining two thirds were a combination of milled and lathed. All connections on the bridge were student made, zero were outsourced.
Drafting

Design Process
The Steel Bridge Team goes through 3 critical phases each year leading up to competition:
Sketching and analysis (AutoCAD and SAP 2000)
3D rendering and shop drawings (SolidWorks)
Fabrication and testing (Machine Shops)

Role Responsibilities
On top of Machine Shop Lead, I am a member of the SolidWorks Drafting team. My role on the SolidWorks team is a simple one - draw the whole bridge on SolidWorks. This team practices SolidWorks in the Fall while the AutoCAD team finalizes tube dimensions, and then my team spends Winter Break drafting the bridge.

Fall
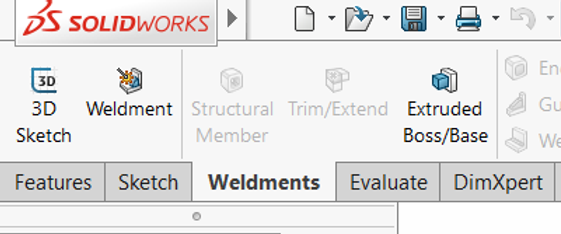
In the Fall, the drafting team focuses on recruiting new members and teaching everyone the SolidWorks packages needed to draw the bridge. The main package used by the drafting team is Weldments. Weldments is a great package designed to draw and connect tube members together. The SolidWorks team takes the AutoCAD file, determines geometry and tube thickness from the design, and then translates them into Solidworks��’ parts to help everyone visualize the bridge.

Winter
This last year I was responsible for 4 bridge geometries. These geometries were broken into top and bottom halves and then mirrored across the bridge. I drew 16 parts and fully specified drawings for each of them. All specs were submitted a week before returning to school so the team lead could review, revise, and finalize the drawings. It is extremely important these drawings are correct and ready to go at the beginning of the spring semester so the manufacturing teams are not slowed down at all.

Final
Overall the bridge required 24 drawing pdfs to be used in the machine shops. These drawings not only helped team members visualize how each bridge link should look, but it generated the Bill of Materials for the bridge to be fabricated.
History
Competition Rules
The National Student Steel Bridge Competition is a contest to see which University can build the most cost-effective bridge. The bridge is broken down into three cost sections.
Constructability: Each bridge is assembled on site in the fewest builder minutes possible. Each teammate who helps construct the bridge is considered a builder. Every builder minute that passes cost $50,000. For example, if you have 6 builders constructing the bridge and it takes them 10 minutes, you have spent 60 builder minutes on the construction ($3,000,000). There are other “construction costs” or penalties, ranging from a loose bolt to a person standing in the river.
Weight: Each pound that the bridge weighs cost $10,000.
Deflection: Every bridge is loaded with 1500 pounds of weight, location determined at the beginning of competition. Each inch of deflection costs $1,000,000. After a certain deflection limit, the bridge is disqualified for safety violations.
Track Record
Freshman 14-15
Cal-El failed at regionals (MidPac), buckled under load.
Sophomore 15-16 (I join)
Caleidoscope - 13th place overall at Nationals (out of 48). Would have finished 2nd place in two scoring categories if we didn’t have a loose bolt.
Junior 16-17
Calabunga - 4th place overall at Nationals (out of 43). 2nd place in two categories, construction speed and construction economy.
“Calabunga_Build.MOV”
Senior 17-18
Coming for the gold. Be sure to tune in to the 2018 NSSBC to see us bring home 1st place.


